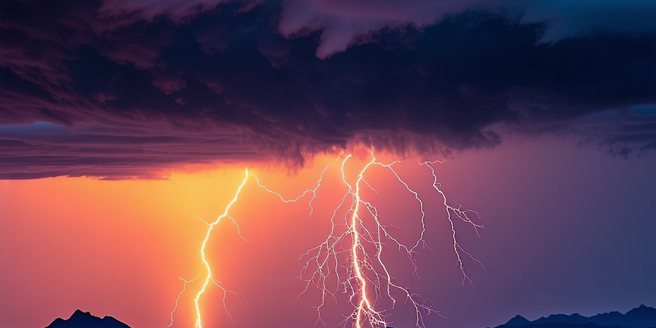
Understanding Lightning: Types and Characteristics
Lightning is a fascinating natural phenomenon characterized by different types, including cloud-to-cloud, cloud-to-ground, and intra-cloud lightning. Each type varies in its formation and appearance. Cloud-to-ground lightning is the most recognized form, creating dazzling displays with potential hazards. Intra-cloud lightning occurs within a single cloud, whereas cloud-to-cloud involves multiple clouds. Understanding these types provides insights into their distinct behaviors and interactions with atmospheric conditions. Characteristics such as brightness, color, and intensity depend on factors like humidity and electrical charge. By understanding these elements, photographers can better anticipate and capture compelling lightning images. Knowledge of lightning’s nature helps in planning photography sessions and choosing the right equipment, enhancing safety and the quality of the shots. Emphasizing these aspects is crucial for those looking to specialize in lightning photography.
Essential Equipment for Lightning Photography
Capturing lightning requires specific equipment to ensure both safety and the quality of photographs. A sturdy tripod is necessary to stabilize the camera during long exposure shots, minimizing blurriness. Wide-angle lenses are ideal for capturing extensive sky landscapes, allowing lightning to be the focal point. A camera with manual settings enables control over exposure, ISO, and focus, essential for dynamic weather conditions. Lightning triggers can be used to automatically capture bolts when they occur, improving success rates in storm-chasing endeavors. Additionally, weatherproof gear protects equipment from elements during unpredictable storms. Backup batteries and memory cards are advisable, as sessions can be lengthy and demanding on resources. Investing in quality gear not only enhances the possibility of obtaining stunning lightning shots but also ensures the photographer’s safety and the durability of the equipment in adverse conditions.
Safety Precautions While Capturing Lightning
Safety is paramount during lightning photography sessions. Lightning is unpredictable and dangerous, requiring photographers to prioritize precautions. Always maintain a distance from open areas, tall structures, and isolated trees. When photographing, remain in a safe, sheltered location such as a vehicle or building. Use remote triggers and long lenses to capture images from a safe distance. Avoid conducting lightning shoots in areas with known high lightning activity without proper safety measures in place. Be aware of weather forecasts and potential storm developments to avoid being caught in hazardous conditions. Adhere to the 30-30 rule: if the time between lightning and thunder is less than 30 seconds, seek shelter immediately. Ensuring all equipment is set up securely and quickly accessible allows for efficient photography while maintaining safety, reducing the risks associated with lightning exposure.
Choosing the Right Location for Best Shots
Selecting an optimal location is crucial for capturing stunning lightning photos. Open areas with a clear view of the sky, such as fields, coastlines, and elevated positions, offer ideal opportunities for striking lightning compositions. Conduct thorough research on potential locations and familiarize with their weather patterns and accessibility. Urban settings provide unique foreground subjects, but safety and obstructions must be considered. Recognizing the weather systems common to different regions enhances the likelihood of capturing dynamic lightning activity. Avoid overcrowded or overly exposed areas where safety might be compromised. Consider how different environments can impact the photo’s mood and composition, whether aiming for dramatic skies over cityscapes or serene rural landscapes. The combination of location insight and timing contributes significantly to the success of lightning photography, enabling photographers to achieve extraordinary visual results.
Camera Settings for Stunning Lightning Photos
Successful lightning photography hinges on utilizing the correct camera settings. Shutter speed is crucial; longer exposures better capture the full impact of a lightning bolt. A setting anywhere between 5 to 30 seconds is often recommended, adjusted according to the frequency and intensity of the lightning. Set a low ISO to minimize noise—lightning is bright and can easily illuminate your shot. Aperture settings between f/8 to f/16 help improve depth of field without overexposing the image. Always shoot in RAW format for greater post-processing flexibility. Manual focus is recommended to ensure sharpness, as lightning can confuse automatic settings. Using a sturdy tripod ensures stability during long exposures. Experimenting with these settings aids in finding the perfect balance for different situations and conditions, resulting in high-quality, awe-inspiring lightning photography.
Post-Processing Tips for Lightning Images
Post-processing is an essential step in refining lightning photos, enabling photographers to enhance their images. Start by adjusting the exposure to ensure the lightning is the focal point, without sacrificing detail in the surrounding landscape. Use contrast sliders to emphasize the brightness of the lightning streaks against darker skies. Color correction helps to bring out any natural hues in the image, allowing the atmosphere to feel authentic. Clarity and sharpness adjustments further define the lightning and surrounding features. Consider cropping the image to improve composition, focusing on the most dynamic elements. Noise reduction tools are beneficial, particularly in nighttime shots or high ISO settings, which can introduce grain. Finally, using creative filters or presets can offer unique stylistic touches, making the image stand out. These techniques empower photographers to transform raw captures into stunning visual narratives.
